chickpea & leek soup
May 12, 2014 § 68 Comments

It was cool and cloudy last Saturday and although I don’t need an excuse to make soup, the gloom outside was calling for the soup pot. Creamy chickpeas and silky sweet leeks give this soup a lovely smooth comforting feel, yet keeping a bit of texture. It tastes fantastic. The soup went wonderfully with a nice bottle of Cabernet from Washington State and a freshly baked crusty baguette from my favorite bakery.
Slightly adapted recipe from Jamie Oliver’s The Naked Chef.
I n g r e d i e n t s
- 3 medium leeks
- 2 tablespoons olive oil
- 1 tablespoon butter
- 2 cloves of garlic, finely sliced
- 1 medium potato, peeled
- 1 – 15 ounce can of chickpeas, drained and rinsed
- salt and freshly ground black pepper
- 4 cups vegetable stock (or chicken)
- 1 or 2 bay leaves
- parmesan cheese
- extra virgin olive oil
M e t h o d
Heat a heavy bottomed pan over medium high, add the oil and the butter. Add the leeks and garlic to the pan, and cook gently with a good pinch of salt until tender and sweet. Add the chickpeas, potato and bay leaves; cook for one minute. Add stock and simmer for 15 minutes.
Ladle out 1/2 of the soup into a large bowl and using a hand blender whizz until smooth, or ladle into a blender and whirl if you are using one. (make sure to keep a breathing space on your blender lid so you do not have hot soup exploding in your kitchen!) Return the smooth portion to the pot, stir well and check for seasoning, add parmesan to taste to round off the flavors. Serve soup with a drizzle of good extra virgin olive oil, shaved parmesan and a twist or two of freshly ground black pepper.

hummingbird cake
May 9, 2014 § 129 Comments

I love the look of this cake. Just the titling alone is enough to make you stop and pay attention. It is earthy and rustic, but charming at the same time. Hummingbird cake is a vintage blue ribbon cake. The first known publication of this recipe was in the February 1978 edition of Southern Living Magazine. It was elected the magazine’s favorite recipe at one point, and won the Favorite Cake Award at the 1978 Kentucky State Fair, as well as several blue ribbons at other county fairs. If you enjoy banana bread you will love this cake. Similar to carrot cake, however, if you don’t care for carrots in your cake, try this as an alternative. Three layers with pecans, mashed bananas, crushed pineapple and a cream cheese frosting. A county fair type of cake.

And talk about a sense of urgency…I’m taking my cake and I am on my way to Fiesta Friday #15. I took one look at Selma’s Asparagus and Feta Cigars and I couldn’t get this cake frosted fast enough.
Recipe adapted from Kinfolk.
I n g r e d i e n t s
For the cake:
- 2 tablespoons unsalted butter, at room temperature
- 3-1/4 cups all purpose flour
- 3 bananas, finely chopped
- 1 cup raw cane sugar
- 1 cup brown sugar
- 1 teaspoon baking soda
- 1 teaspoon ground cinnamom
- 1 teaspoon salt
- 3 large eggs, beaten and at room temperature
- 1-1/2 cups vegetable oil
- 1 cup crushed pineapple
- 1-1/2 teaspoons vanilla
- 2-1/4 cups pecans, chopped
For the frosting:
- Two 8 ounce packages cream cheese, at room temperature
- 2 sticks unsalted butter, at room temperature
- confectioners’ sugar, approximately 3 cups
- 1 teaspoon vanilla
Position two racks in the upper third and lower third of the oven and preheat the oven to 350°F. Grease three 9-inch round cake pans with the butter. Dust the pans with 1/4 cup flour and knock out any excess; set aside.
In a large bowl whisk together the remaining 3 cups flour, the sugar, baking soda, cinnamon, and salt. Add the eggs and oil and stir just until the dry ingredients are moistened. Stir in the pineapple, vanilla, and half of the pecans.
Divide the batter equally among the prepared pans. Set two pans on the top rack and one on the bottom. Bake, rotating and alternating the cakes halfway through the baking time, for 25 to 30 minutes or until a tester inserted in the center of the cakes comes out clean. Transfer the cakes to racks and cool in the pans for 10 minutes, then invert them directly onto the racks and cool completely, about 1 hour.
While the cake cools prepare the frosting. Beat the cream cheese and butter with an electric mixer on medium speed until light and fluffy, about 3 minutes. Decrease the speed to low and add the confectioners’ sugar and vanilla. I usually do a taste test to see how much sugar is needed to my desired sweetness. It is usually less than the recipe calls for. Beat until light and fluffy, about 3 minutes.
To assemble, spread the frosting between the layers, scattering some of the remaining pecans in between. Continue spreading the frosting on the top and sides of the cake and sprinkle the remaining pecans on top.
************************************************************************************

And speaking of vintage, this little guy has been watching over me in the kitchen since Christmas. One day I mentioned to my teenage son how I wanted a Pillsbury Doughboy when I was a little girl, but my wish never came true. He searched and found one on Etsy and this was his gift to me. It’s vintage…1971. A vintage cake and a vintage doughboy. His real name is Poppin’ Fresh.
harissa potatoes
May 7, 2014 § 77 Comments

Harissa potatoes would be perfect with eggs on a Saturday morning, or as a dinner side with roasted chicken. You could serve these as part of a meze, a selection of small dishes to make a meal, in the same way tapas are served in Spain, or, as we American’s might enjoy small plates dining. These potatoes are lovely served warm or room temperature with a tomato salad, tzatziki, and a good home made hummus.
We have been enjoying the flavor combination of sundried piments, extra virgin olive oil, garlic, sun dried tomatoes, coriander and caraway seeds in a traditional harissa paste which is hand made in Tunisia. Harissa is a hot sauce (or paste rather) used in North African cuisine, made from chili peppers, spices, and olive oil. My store bought harissa paste adds a delicious flavor to bland foods such as chickpeas, carrots and potatoes. Although I haven’t made my own harissaa yet, John fromthebartolinikitchens’ has a recipe you could try. Visit his post to learn more about harissa and for a wonderful chicken thigh recipe too.
Recipe slightly adapted from Herbivoracious.
I n g r e d i e n t s
- 1 tablespoon olive oil
- 1/2 cup diced onion
- 3 medium size potatoes -yukon golds would be a nice choice
- 2 teaspoons harissa paste
- 1 tablespoon minced preserved lemon, I found this at our local market
- 1 teaspoon cumin
- sea salt, to taste
- crumbled feta cheese for serving
- fresh dil for serving
Heat the olive oil in a medium skillet over medium-high heat. When the oil is shimmering, add the onion and cook for 1 minute until it begins to soften. Add the potatoes, harissa, preserved lemon, cumin, and salt and cook, stirring occasionally until the potatoes are lightly browned on the outside and tender in the middle. It helps to cover the pot so that the tops of the potatoes are steaming a bit while the bottoms are browning. Uncover for the last couple of minutes.
To serve, taste and adjust seasoning. You might need more salt, harissa, or preserved lemon. Transfer to serving plate and garnish with the feta cheese and a very generous amount of fresh dill.
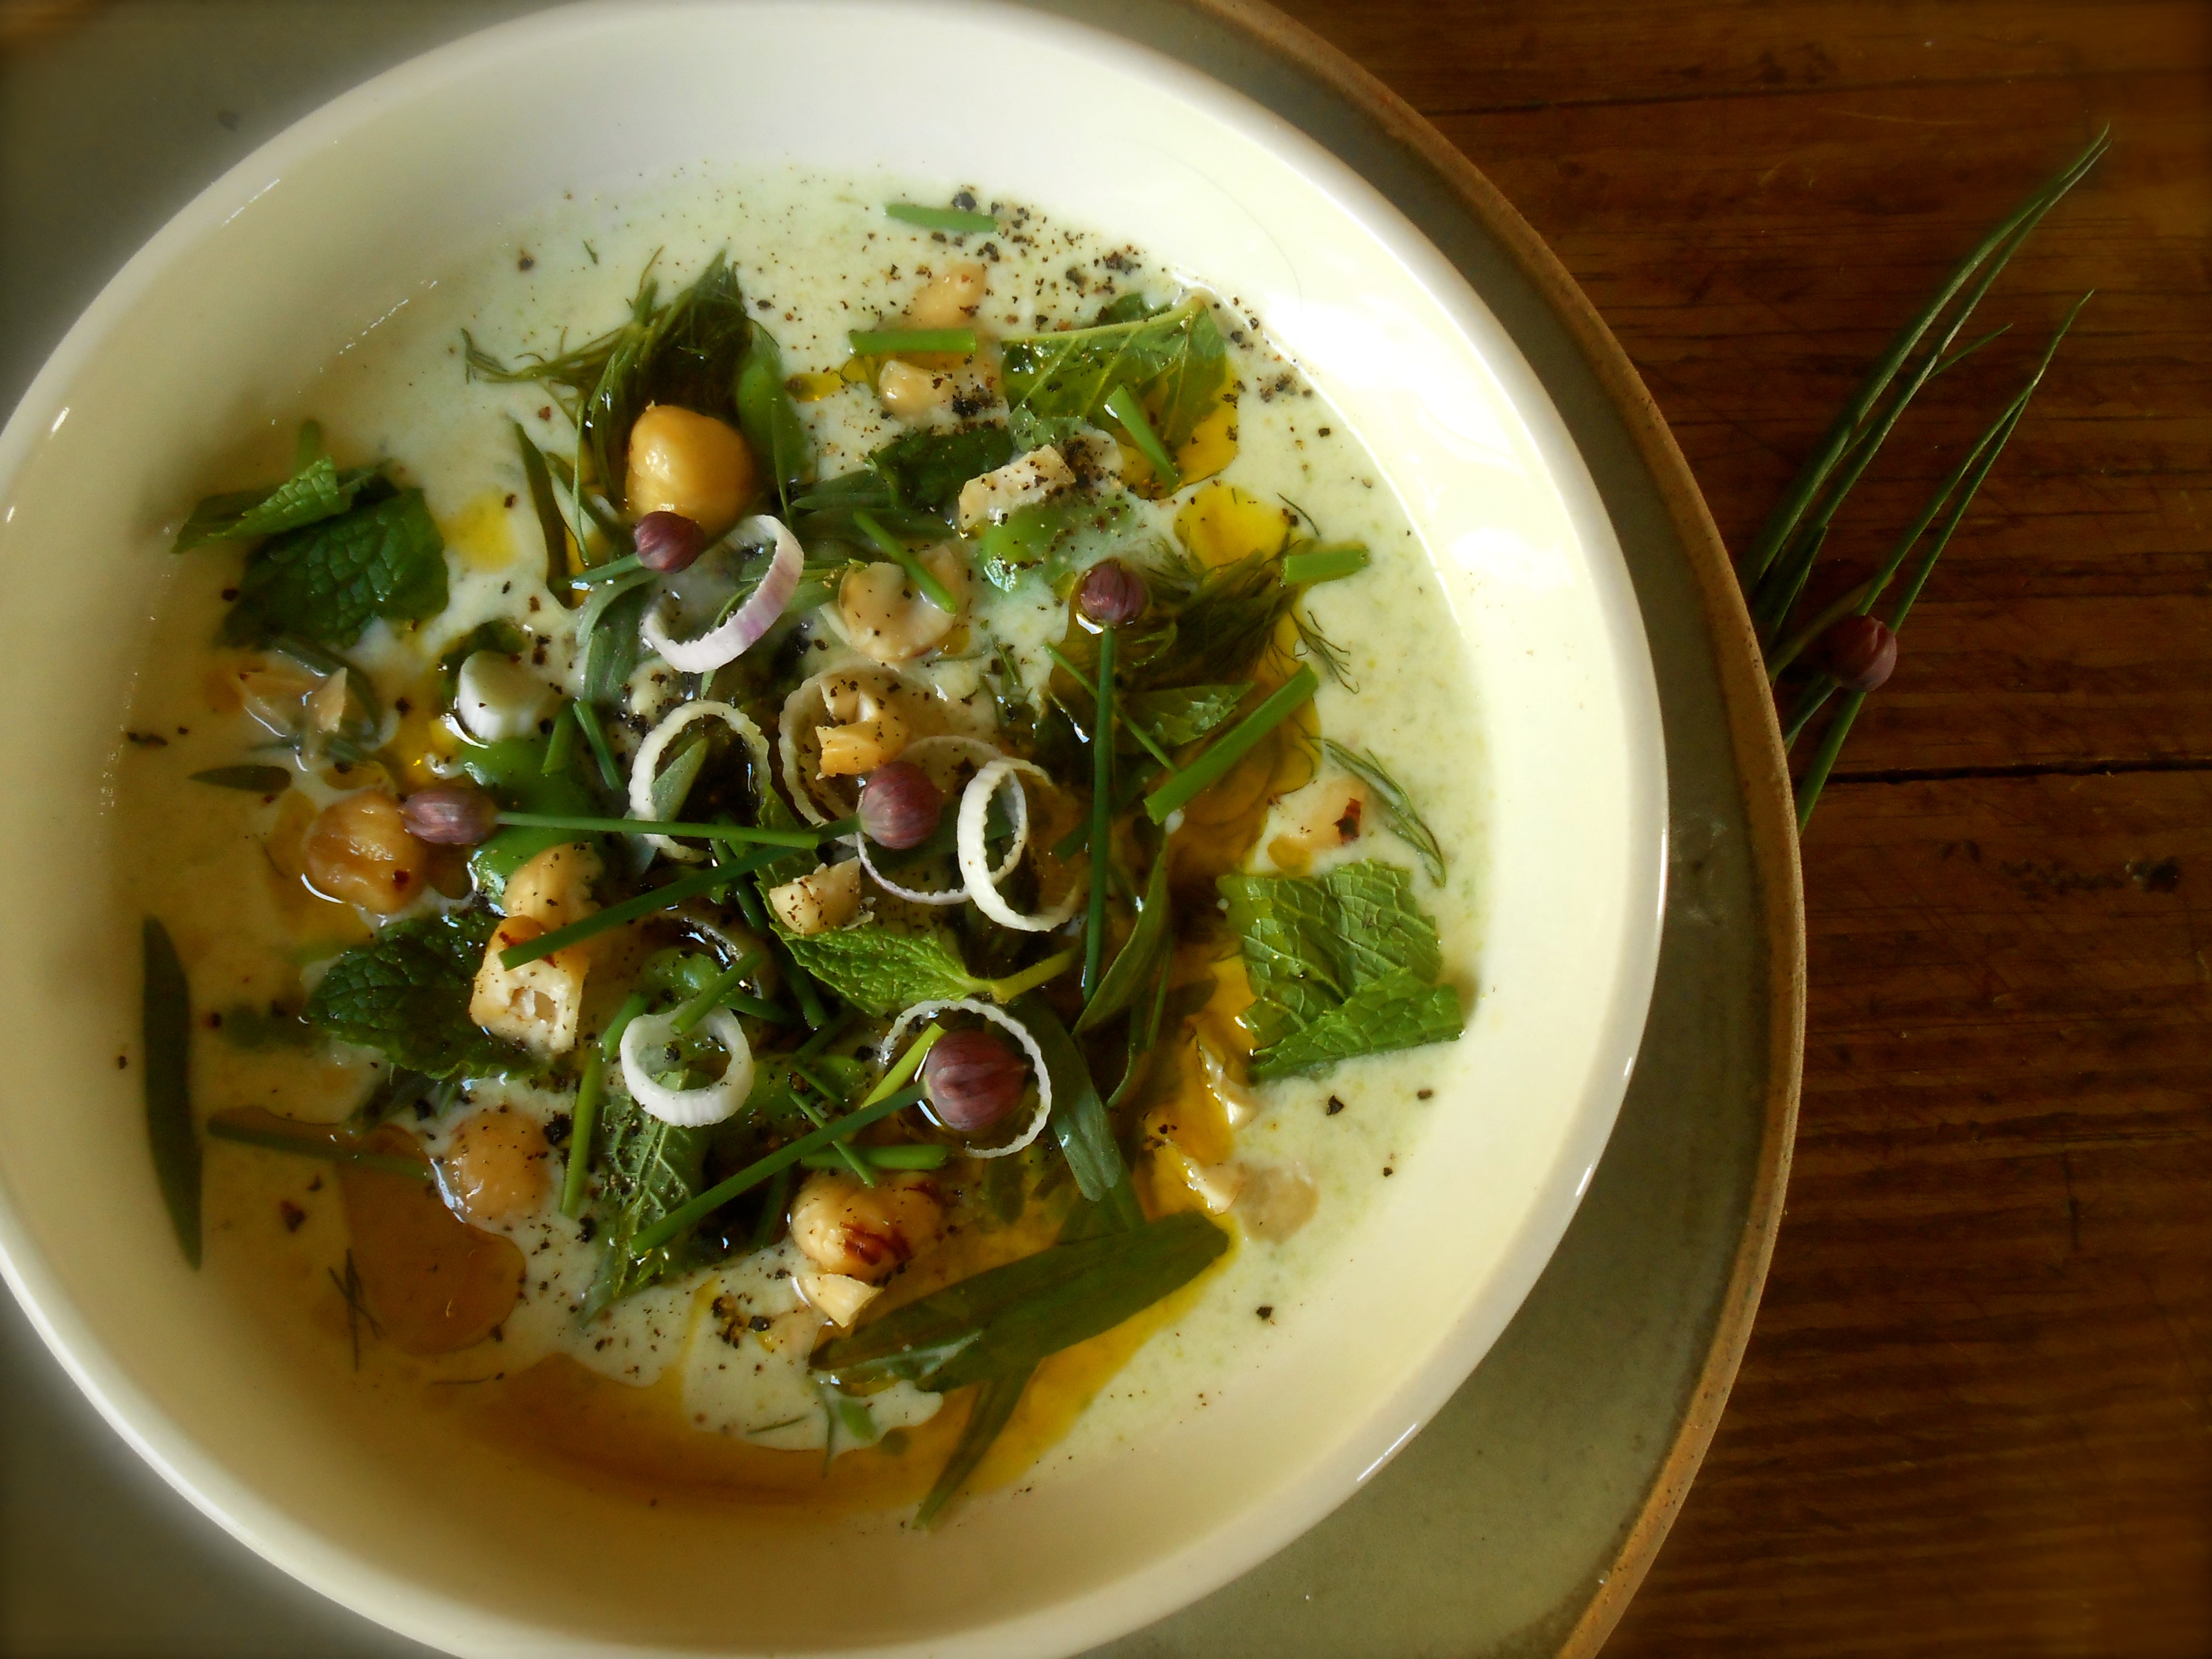
yogurt & fava bean soup
May 2, 2014 § 116 Comments
I began my seasonal hunt for fava beans when I came across this hot yogurt and fava bean soup recipe from Yotam Ottolenghi. The first sighting of fava beans is always a sign warmer weather is upon us. And indeed it is. We have had 80°F temperatures for the past two days. Seattle does not have extreme weather. We don’t have sweltering heat in the summer or freezing temperatures in the winter. I have heard our fine city referred to as a best kept secret because of the mild temperatures and tolerable seasons. And with that, and a little rain (ok, a lot) comes an abundance of farm fresh foods.
I have this personal tradition of preparing a spring soup every year at the start of spring. This is my way to welcome in the season and all its glory. This year I decided on a heavily ladened herb soup. The fava beans in this soup are pureed with the yogurt and long-grain rice until smooth and creamy, which really is a wonderful base. However, a base sometimes needs something on top and after adding fresh herbs, hazelnuts, spring garlic and asparagus tips the soup becomes unforgettable.
I hope I’m not too late for Fiesta Friday #14. I could really use a party today. And with Saucy and Johnny hosting, no way was I going to miss this one. It’s still gin o’clock right? Ok, where is the blackberry gin fizz?
I n g r e d i e n t s
- 2 cups of shelled fava beans (from about 1 1/2 to 2 pounds of unshelled fava beans)
- 1/4 cup long-grain rice
- 1- 3/4 cup greek yogurt
- 2 garlic cloves, crushed into paste
- 1 large egg
- 4 cups of vegetable stock
- fresh herbs for garnish, such as, tarragon, dill, chives, chive flowers, mint, cilantro, roughly chopped
- grated zest and juice of 1 lemon
- toasted and chopped nuts for garnish, I used hazelnuts
- extra virgin olive oil, for drizzling over finished soup
- sea salt and freshly ground black pepper to taste
M e t h o d
For the fava beans:
Prepare an ice water bath. Bring a large pot of water to a boil. Drop in the shelled fava beans and cook for a minute or two. Drain. Immediately transfer the beans to the ice water bath. Remove the skins by gently pushing your fingers against the sides of the bean (the favas should easily slide out). Place into a bowl. Set aside.
Heat the vegetable stock in a large soup pot. Add the rice, bring to a boil, then lower the heat, cover and simmer for 20 minutes or until the rice is tender. Add half of the fava beans. Season with salt and pepper, and using a hand blender, blend until completely smooth.
In a separate heat-proof bowl, whisk together the yogurt, crushed garlic, and egg. Add a ladleful of the hot soup and whisk together. Continue adding the hot soup slowly, until you’ve mixed about half of the soup into the egg mixture, do this slowly so the yogurt doesn’t split due to differences in temperature. Pour the tempered yogurt back into the pot with the remaining soup.
Place the soup on medium heat until warmed through. Make sure it doesn’t boil. Season with salt and pepper to taste.
Ladle the soup into four shallow bowls. Evenly scatter the remaining fava beans on top. Garnish with fresh herbs, lemon zest, sprinkling of chopped nuts, a drizzle of extra virgin olive oil, and a squeeze of lemon.
torta pasqualina
May 1, 2014 § 74 Comments

A portion of my cooking inspiration comes from a handful of cookbooks that are sitting on our bookshelf, as well as two magazine subscriptions I receive every month. However. nearly all of my inspiration comes from all the wonderful food blogs I love to read. I finally got a handle on my bookmark bar the other day where hundreds of recipes are parked and waiting for my attention. It is like having a hundred cookbooks at my fingertips. This dreamy pie recipe was at the top of my list to prepare.

A week or so ago while visiting Lindy’s Love in the Kitchen the only thing keeping me from standing up, walking to the kitchen and getting started on this pie was the fact I did not have ricotta cheese. I love that sense of urgency to get up, run out to the market, gather the ingredients and prepare a meal inspired by seeing a beautifully presented post. I like to call this sense of urgency pure inspiration. And this was one of those posts. Without a doubt this recipe brought Love in the Kitchen.
Knowing this torta was going to be fabulous I did not alter or adapt the recipe in any way. Thank you Lindy. We loved your torta pasqualina.
Recipe from Love in the Kitchen.
I n g r e d i e n t s
- 5 hard-boiled eggs, peeled and cut in half lengthwise
- 1 egg, uncooked and lightly beaten
- One large tub – 312 grams or 11 oz fresh (preferably organic) spinach, washed, dried and trimmed
- 2 tbsp extra-virgin olive oil
- 1 large onion, finely chopped
- 400 grams (just less than 1 lb) of ricotta cheese
- 1 cup sharp cheddar, grated
- ⅓ cup parmesan, grated
- ½ tsp salt
- freshly ground black pepper
- 397 grams (or closest equivalent including 1lb) ready-made puff pastry

M e t h o d
Preheat the oven to 400F/200C. Lightly grease a deep dish pie plate.
In a large fry pan, cook the onion in the olive oil until the onion is lightly browned. Add the spinach and cook over medium-low heat 3-4 minutes or until the spinach is just wilted. Remove from the heat and add the ricotta, cheddar, parmesan, half of the beaten egg (reserve remainder for brushing the pastry) and seasonings.
Roll out half the puff pastry to about .5cm or ¼ inch thickness and line the pie dish. Fill with half the spinach mixture. Add the hard-boiled eggs, yolks down, evenly spaced. Top with remaining spinach mixture.
Roll out remaining pastry and top the pie, taking care to seal the edges of the pie.
Using a pastry brush, glaze the top of the pie with the remaining half beaten egg. Make several small incisions in the top of the pie to allow steam to vent.
Bake 25-30 minutes or until risen and golden brown. Remove from oven and allow to cool at least ten minutes before slicing and serving. Also good served at room temperature.

birdie in the basket
April 28, 2014 § 107 Comments

We all have rituals in our lives we love and by nature make them happen. Without a thought or plan these moments naturally fall into place. It is a recurring event permanently marked on our minds daily calendar. My dearest ritual is dinnertime. Every evening we gather around our table to sit down, share a meal together and nourish ourselves. This tradition has become such a valued part of our lives. The conversation flows naturally and we are able to slow down and breathe. And gathering around the table on the weekends for breakfast, unhurried and fresh, is a different sort of gathering altogether. A perfect start to a day of chores, leisure and a nice bike ride.

Here is a lovely way to turn an ordinary hash brown and egg breakfast into impressive single serving entrée. The hash browns are first cooked in a skillet until browned and crisp then divided between the muffin cups. After a sprinkling of cheese an egg is cracked on top and finished off with a a sliced cherry tomato, a dollop of pesto and baked for 20 – 30 minutes.

Recipe from Better Homes and Garden.
I n g r e d i e n t s
- 2 russet potatoes, washed peeled and coarsely grated
- 1/4 cup + 1 tablespoon olive oil
- 1 tablespoon butter
- 6 eggs
- 1/4 cup of your favorite cheese to pair with baked eggs – I used a balsamic Bellavitano cheese
- handful of basil or cilantro
- 1/4 cup freshly grated parmesan cheese
- 2 tablespoons of walnuts
- 6 cherry tomatoes
- sea salt and fresh ground pepper
M e t h o d
Hash Brown Potatoes
Peel and coarsely shred potatoes. Place potatoes in a large bowl; add enough water to cover potatoes. Stir well. Drain in a colander set over the sink. Repeat rinsing and draining two or three times until water runs clear. Drain again, pressing out as much water as you can with a rubber spatula. Line a salad spinner with paper towels; add potatoes and spin. Repeat, if necessary, until potatoes are dry. If you do not own a salad spinner you may use a kitchen towel and wring out your potatoes. You want your potatoes to be as dry as possible. The hash browns will steam rather than brown if too much water is on them. Transfer potatoes to a large bowl. Sprinkle with salt and pepper; toss to combine.
Heat 1 tablespoon of the oil and the butter in a large skillet over medium-high heat until butter foams. Add potatoes to the skillet, spreading into an even layer. Gently press with the back of a spatula to form a cake. Reduce heat to medium. Cook, without stirring, about 12 minutes or until the bottom is golden brown and crisp.
Invert a plate over the top of the skillet. Carefully turn the skillet over to transfer the potatoes onto the plate. If needed, add the remaining 1 tablespoon oil to the skillet. Using the plate, slide the potatoes back into the skillet, uncooked side down. Cook about 8 minutes more or until the bottom is golden brown. Let hash browns stand about 10 minutes or until cool enough to handle.
While the hash browns are cooking prepare your pesto.
Since it is morning time I chose not to use garlic in our pesto. If you would like the flavor of garlic add one small clove to this mix.
Place a large handful of your choice of herbs (cilantro or pesto) into your food processor or blender with 1/4 cup olive oil, walnuts and parmesan cheese and whizz until well blended. Set aside.
Assembling the birdie baskets
Once you are able to handle the hash brown…
Divide hash browns between muffin cups, pressing hash browns into the bottoms and up the sides of the cups. Add a sprinkling cheese among hash-brown-lined cups. Crack an egg into each cup. Top each cup with 1 teaspoon of the pesto and two of the tomato halves. Bake for 20 minutes or until whites are set and yolks are thickened. Let stand for 3 to 5 minutes before serving. Carefully remove from the muffin cups.
strawberry rhubarb crumble
April 25, 2014 § 81 Comments

It is rhubarb season! Next time you go to the market pick up 8 stalks of rhubarb along with a punnet of strawberries and make this crumble. This dessert is deliciously sweet from the strawberries but pleasantly sharp and tangy from the rhubarb and lemon. I am not a skilled baker at all, but while in the middle of making the crumble topping something about the measurements and ingredients in the particular recipe I was using did not seem quite right. I stopped to take a quick look at other recipes online to compare crumble toppings. In my search I stumbled upon this scrumptious Smitten Kitchen strawberry rhubarb crumble. I switched recipes and in no time this was in the oven. Serve this while it is still warm with a scoop of vanilla bean ice cream, you and those your are dining with will be very happy.
Slight adaptation from Smitten Kitchen’s recipe. (In the filling I used flour instead of corn starch and suggest using juice from 1/2 lemon rather than one whole lemon)
I n g r e d i e n t s
For the topping:
1 1/3 cup flour
1 teaspoon baking powder
3 tablespoons sugar
3 tablespoons Demerara sugar
Zest of one lemon
1/4 pound (1 stick) unsalted butter, melted
For the filling:
1 1/2 cups rhubarb, chopped into 1-inch pieces
1 1/2 cups strawberries, sliced in half
1 quart strawberries plus a few extras, hulled, quartered
Juice of 1/2 lemon
1/2 cup sugar
2 tablespoons flour
Pinch of salt
Heat oven to 375°F. Prepare topping: In a mixing bowl, combine flour, baking powder, sugars and lemon zest and add the melted butter. Mix until small and large clumps form. Refrigerate until needed.
Prepare filling: Toss rhubarb, strawberries, lemon juice, sugar, four and a pinch of salt in a 9-inch deep-dish pie plate.
Remove topping from refrigerator and cover fruit thickly and evenly with topping. Bake until crumble topping is golden brown in places and fruit is bubbling beneath, about 40 to 50 minutes. Crumble filling has a tendency to spill over in your oven while baking. Place pie plate on a foil lined baking tray to prevent a mess in your oven!
roasted asparagus with pistachio nut purée
April 24, 2014 § 76 Comments

This is a seriously delicious light dinner. The recipe comes from a local Seattle cook Michael Natkin. He has a wonderful cookbook called Herbivoracious and a blog full of unique vegetarian recipes. Here we have a pistachio nut puree although as he puts it “puree isn’t quite the right word. It is more like a nut-based hummus; rich, creamy, slightly fluffy, but packed full of the flavor of roasted nuts.”
I n g r e d i e n t s
- 1 cup unsalted, roasted pistachios
- juice of 1/2 lemon
- 1 small garlic clove, thinly sliced
- 1/2 teaspoon salt
- 1/2 teaspoon ground cumin
- 1/2 teaspoon smoked paprika
- 1/3 cup extra virgin olive oil
- 1/3 cup water, or a little more as needed
- 1 pound fat asparagus spears, trimmed
- extra virgin olive oil
- sea salt
- good quality balsamic vinegar
- 1/4 cup unsalted, roasted pistachios, coarsely chopped
- flaky salt
- fresh chives
Combine the pistachos, lemon juice, garlic, salt, cumin, smoked paprika, and half of the olive oil in the blender. With the lid on and the blender running on medium low speed, drizzle in the remaining oil and then the water, stopping to scrape down the sides as needed. Blend until color lightens and fairly smooth but not completely textureless. You may need to add a little more water.
Taste and adjust seasoning; it will likely need more salt and possibly more lemon juice or spices, but don’t overpower the pistachio flavor. Reserve, with plastic wrap on the surface to prevent oxidation.
Preheat oven to 400°F. Toss the asparagus with a bit of olive oil and sea salt. Roast on a baking sheet until tender, about 10 minutes. Turn on broiler and cook until blackened in spots. To serve, spoon the pistachio puree on a plate and place the asparagus on top. Garnish with the balsamic vinegar, chopped pistachios, flaky salt and snipped chives.

mac and cheese
April 21, 2014 § 79 Comments
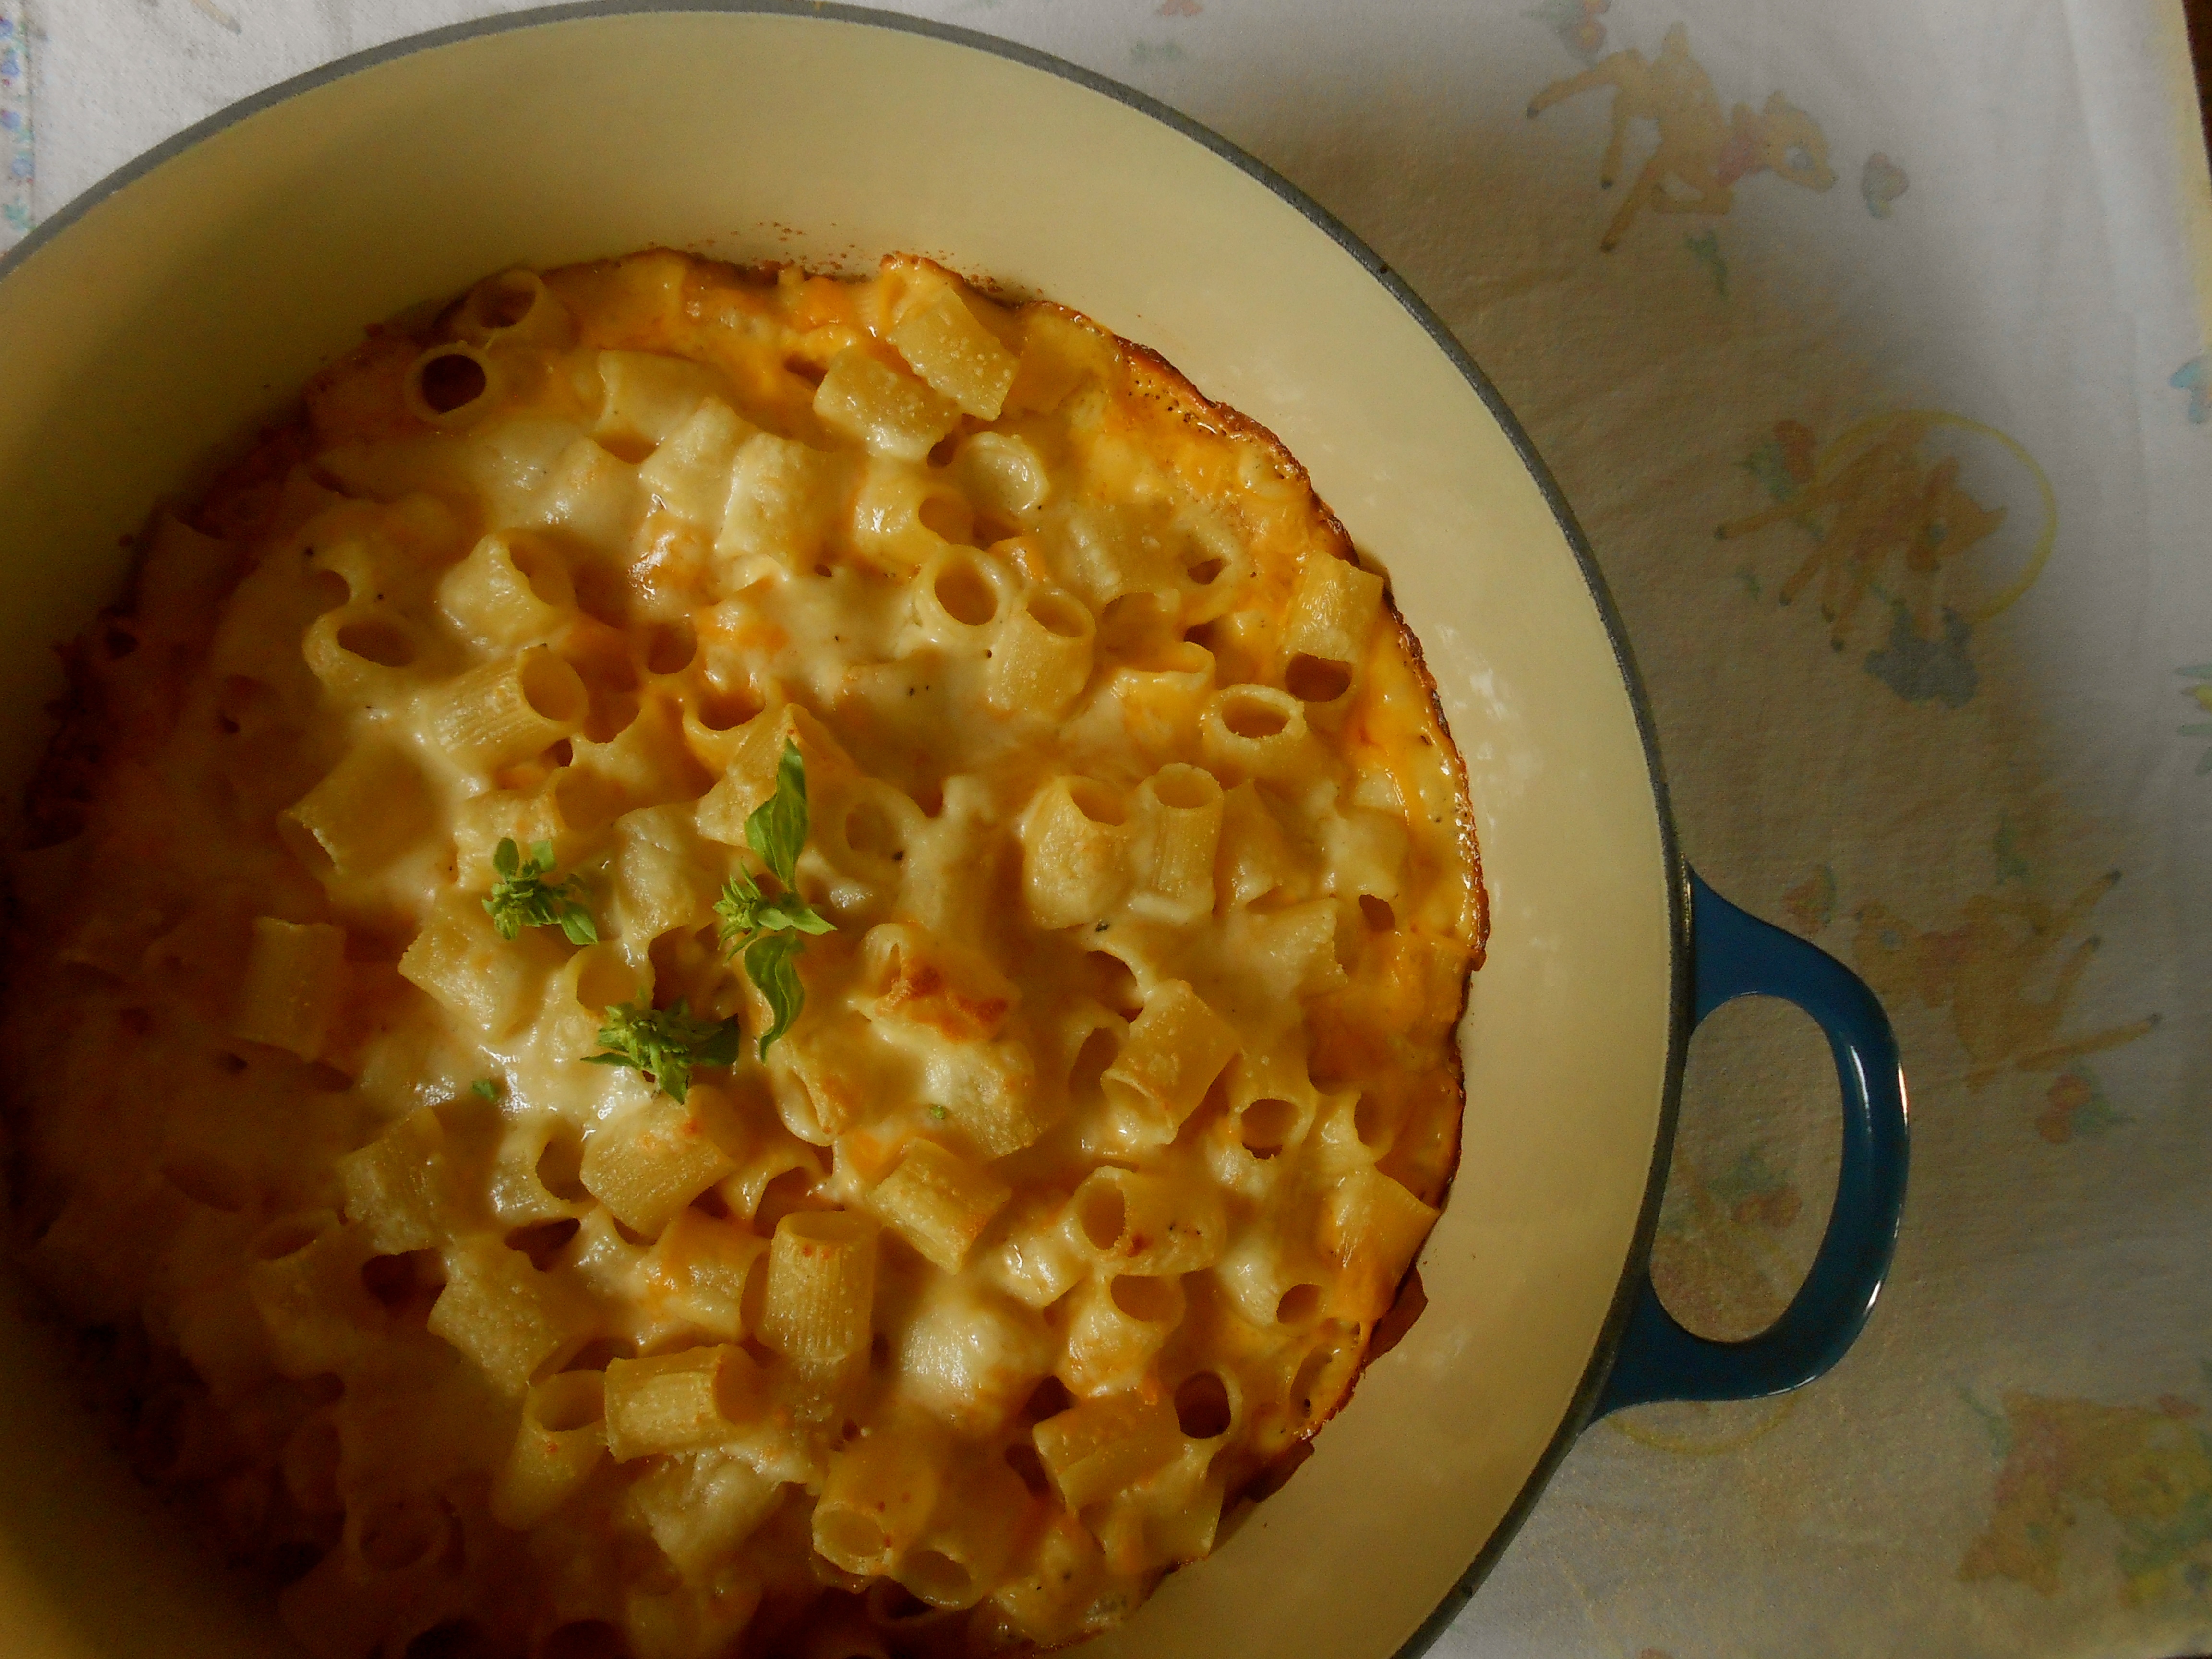
Little people love macaroni and cheese. My son grew up on boxes of Annie’s shells and cheese. Some fortunate parents are able to sneak vegetables into the mix, such as peas or broccoli. Not us. He would not touch it if there was anything green inside. Thankfully he loved fruit and there was always little side dishes of strawberries, apples, grapes or oranges. Even adults needs this kind of food at times. The soft texture and mild cheesy flavor of macaroni and cheese remind us of our childhood meals, when we felt safe and cared for, bringing comfort to our soul.
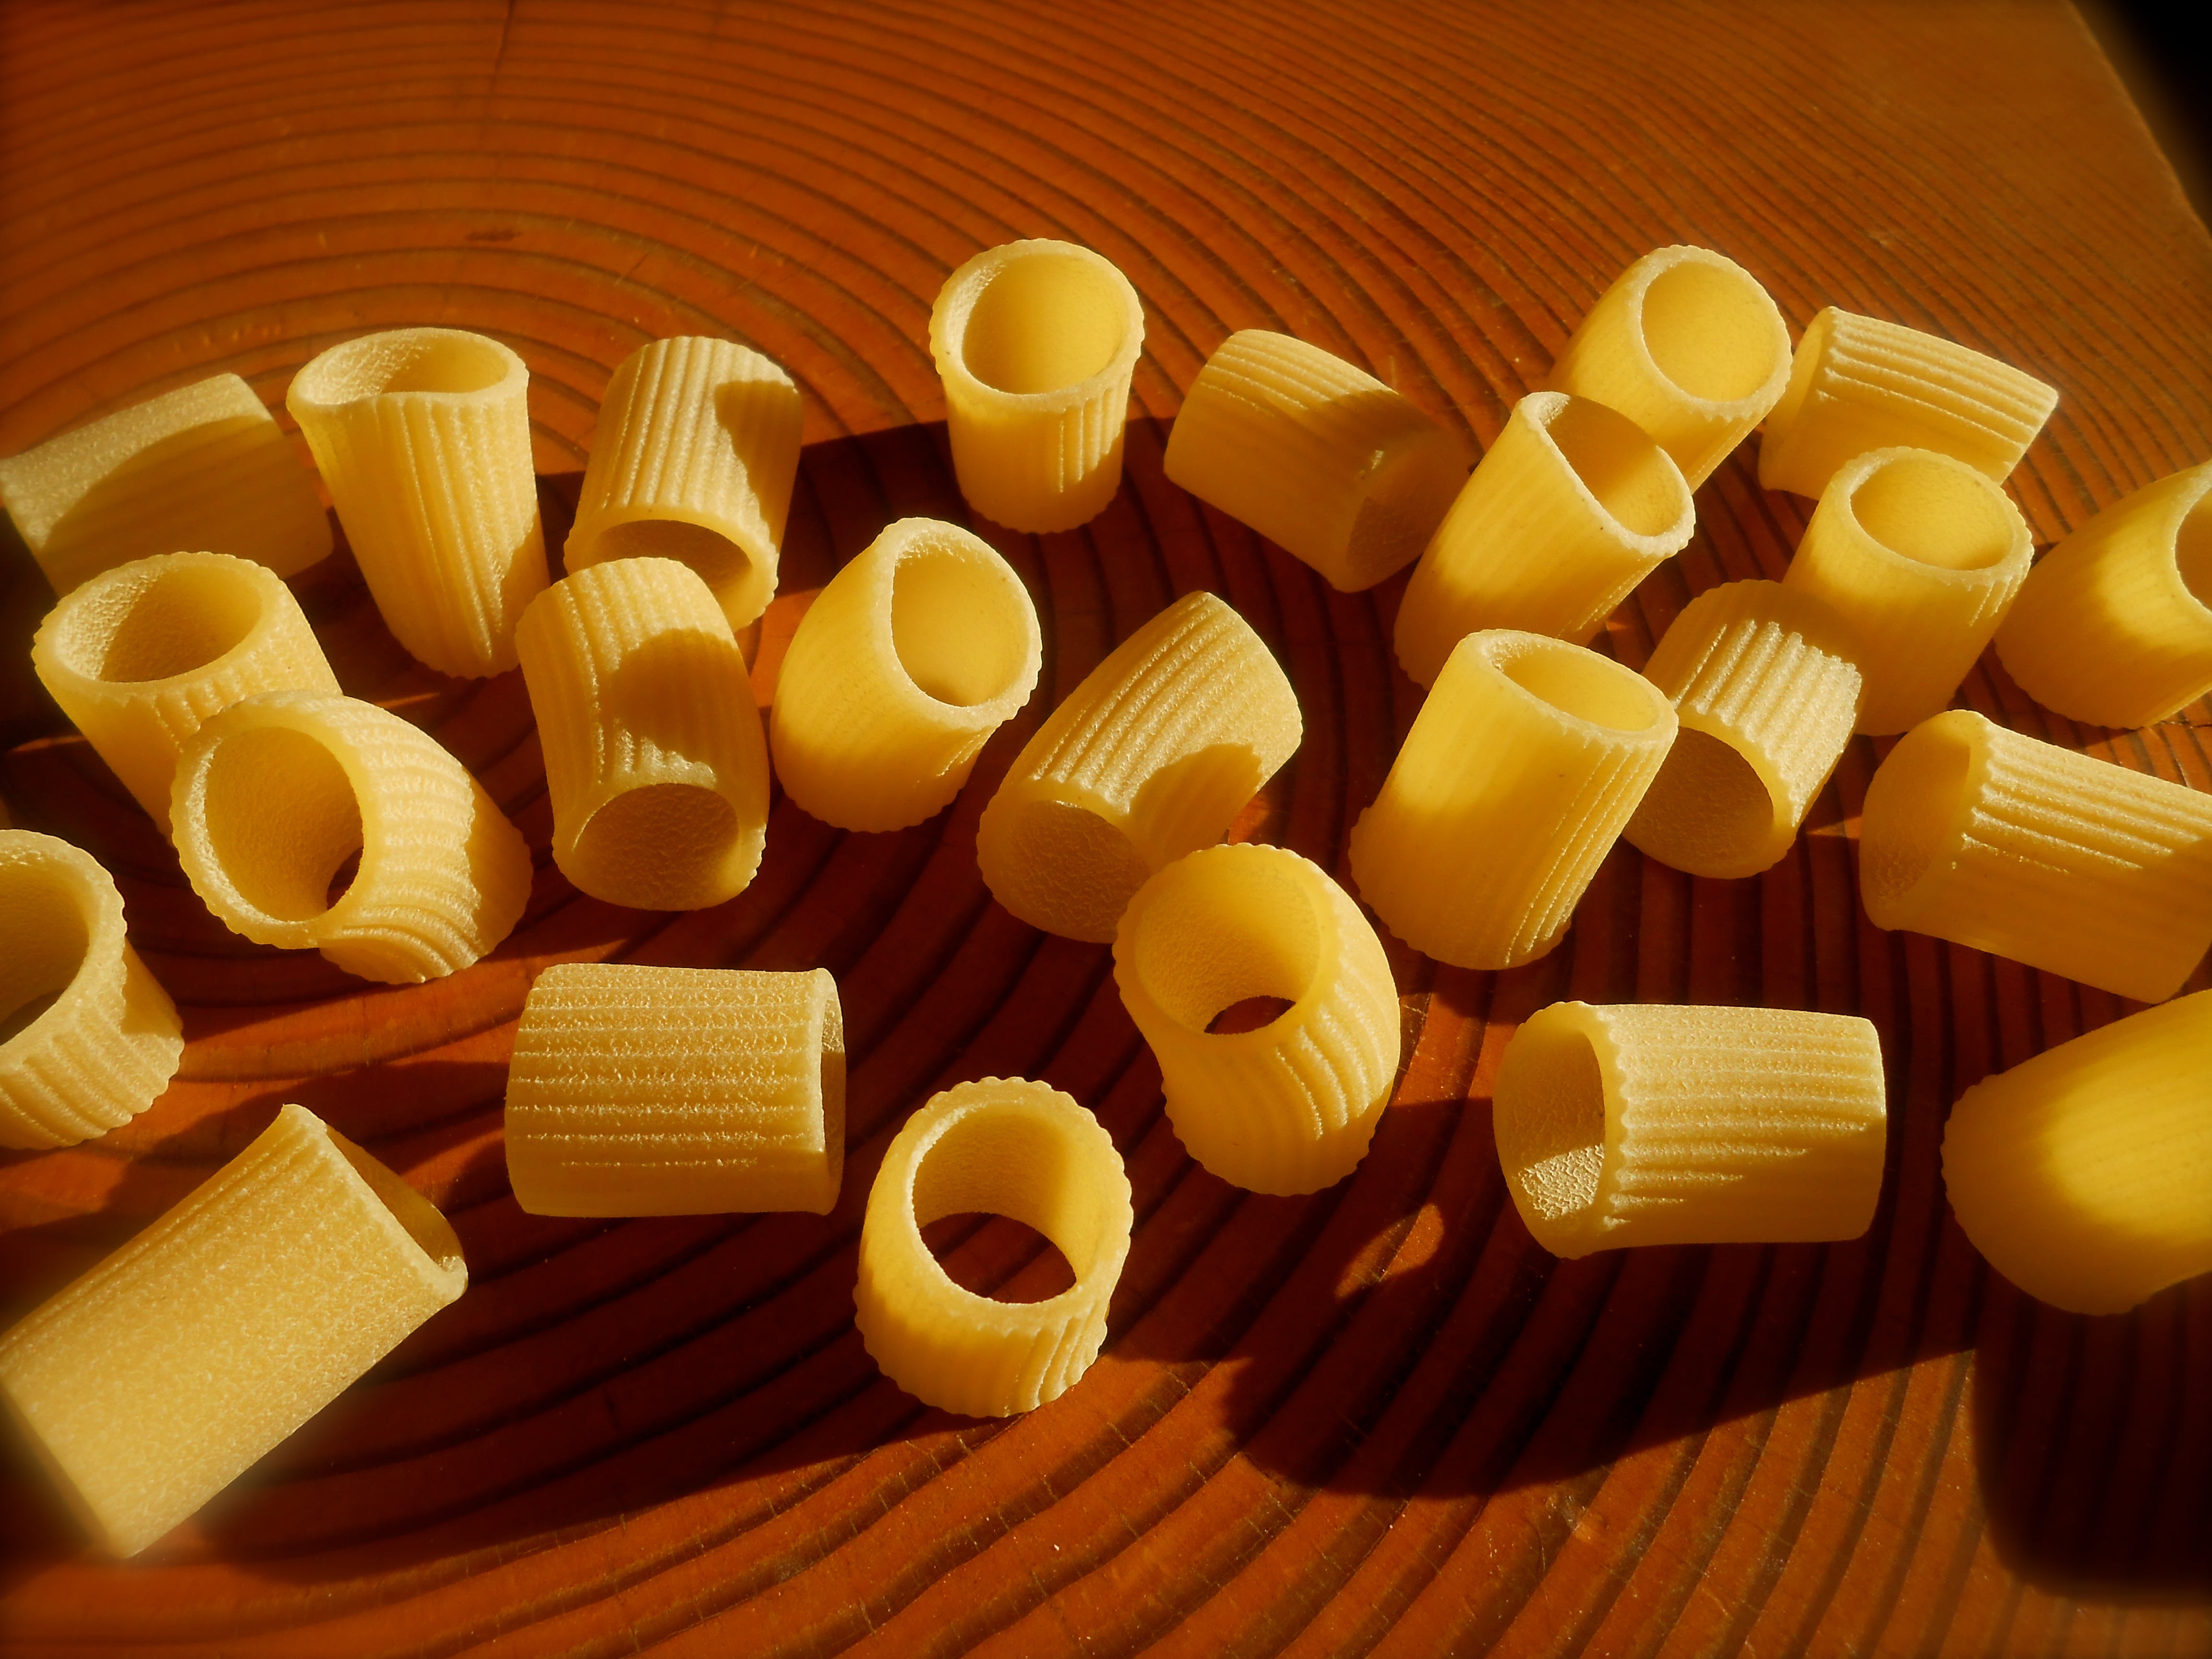
I used mezzi rigatoni. This would have been wonderful with added english peas. The peas would have fit perfectly in the wide open holes of the rigatoni. But we couldn’t have anything green inside now could we?
I n g r e d i e n t s
- 1 pound of macaroni or rigatoni
- 1/2 stick of butter
- 1/3 cup all purpose flour
- 4 cups milk, heated
- 2 cups shredded extra sharp cheddar cheese
- 2 cups finely chopped american cheese – yes…the ooey gooey stuff…for the kids
- salt and ground pepper
- 1/4 cup freshly grated parmesan cheese
- hot pepper sauce (for serving)
M e t h o d
Bring a large pot of salted water to a boil over high heat. Add the pasta and cook until al dente. Drain well. Position a rack in the center of the oven and preheat the oven to 350°F. Butter a deep 4-quart casserole. Melt the butter in a medium saucepan over medium heat. Whisk in the flour. Gradually whisk in the milk. Bring to a simmer, stirring constantly, until the sauce thickens. Reduce the heat to low and simmer for 5 minutes. Remove from the heat and stir in 1 cup of the cheddar and 1 cup of the american cheese. Season to taste with salt and pepper. Spread one third of the pasta over the bottom of the casserole dish. Top with half of the shredded cheeses and a third of the sauce. Repeat, using another third of the pasta with the remaining cheese and half of the sauce. Finish with the remaining pasta and sauce. Sprinkle parmesan cheese over the top. Bake until bubbly and golden brown around the edges, about 30 minutes.
orange blossom honey cake
April 17, 2014 § 78 Comments
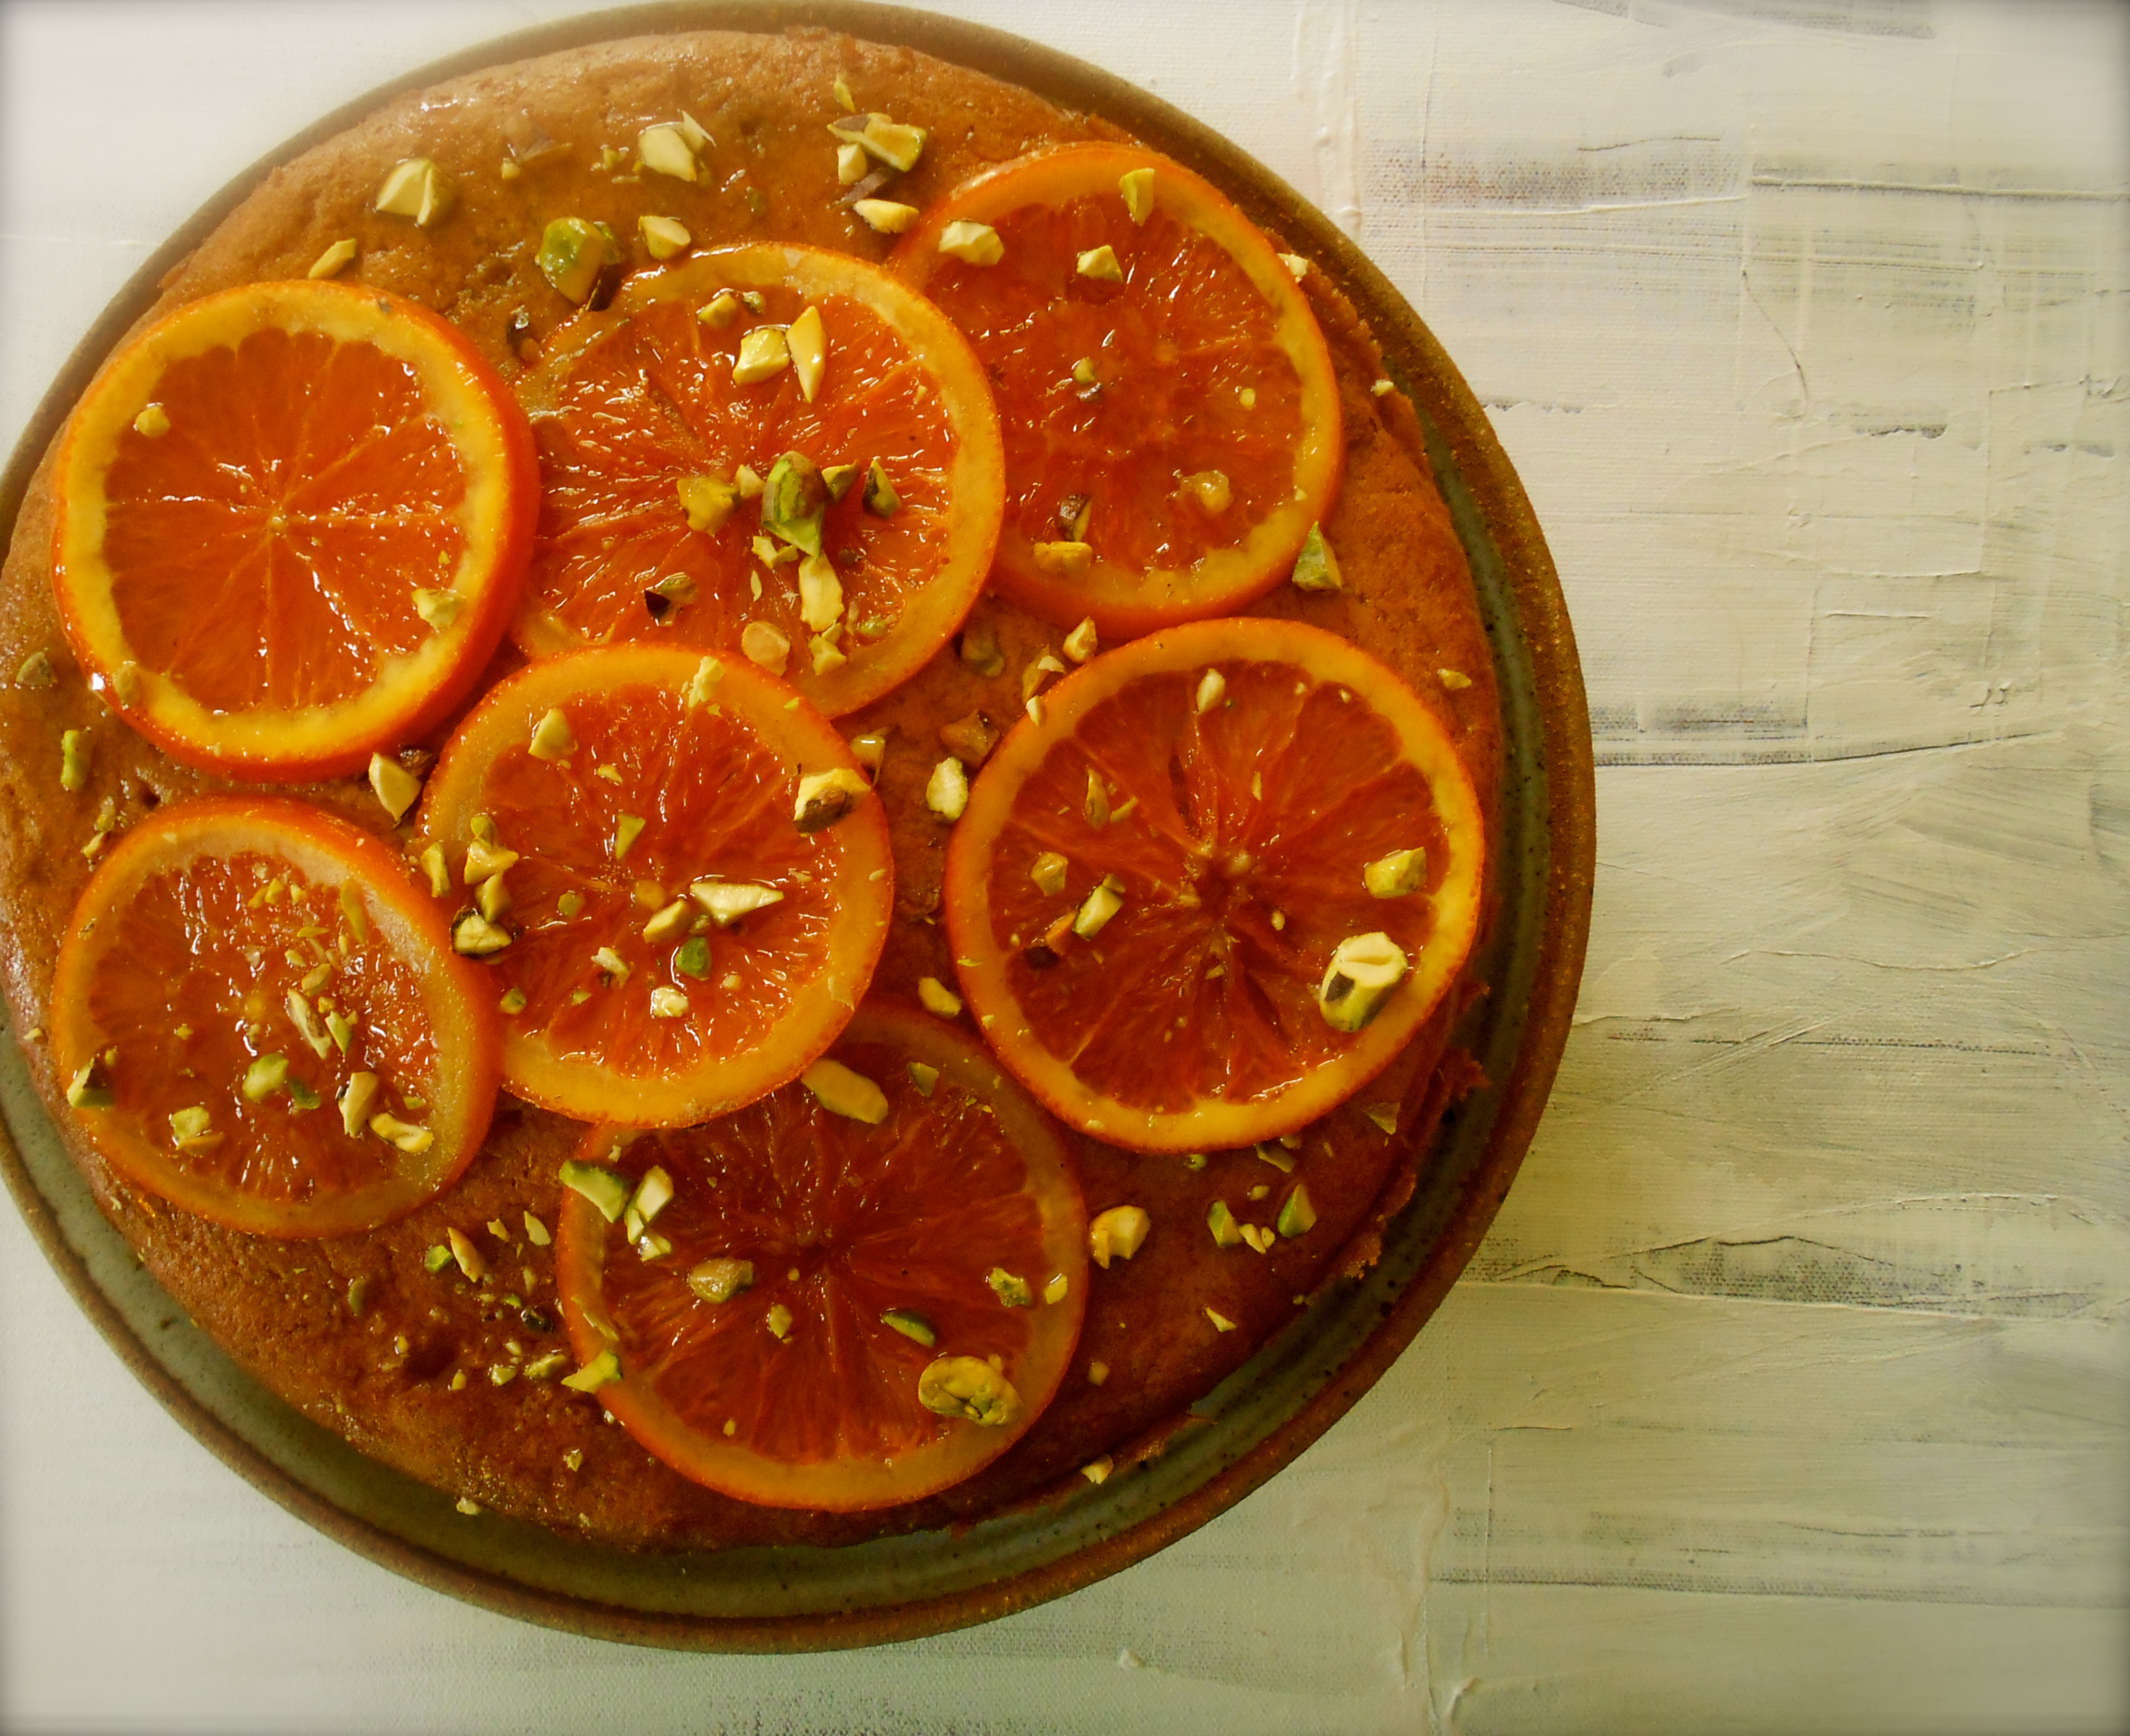
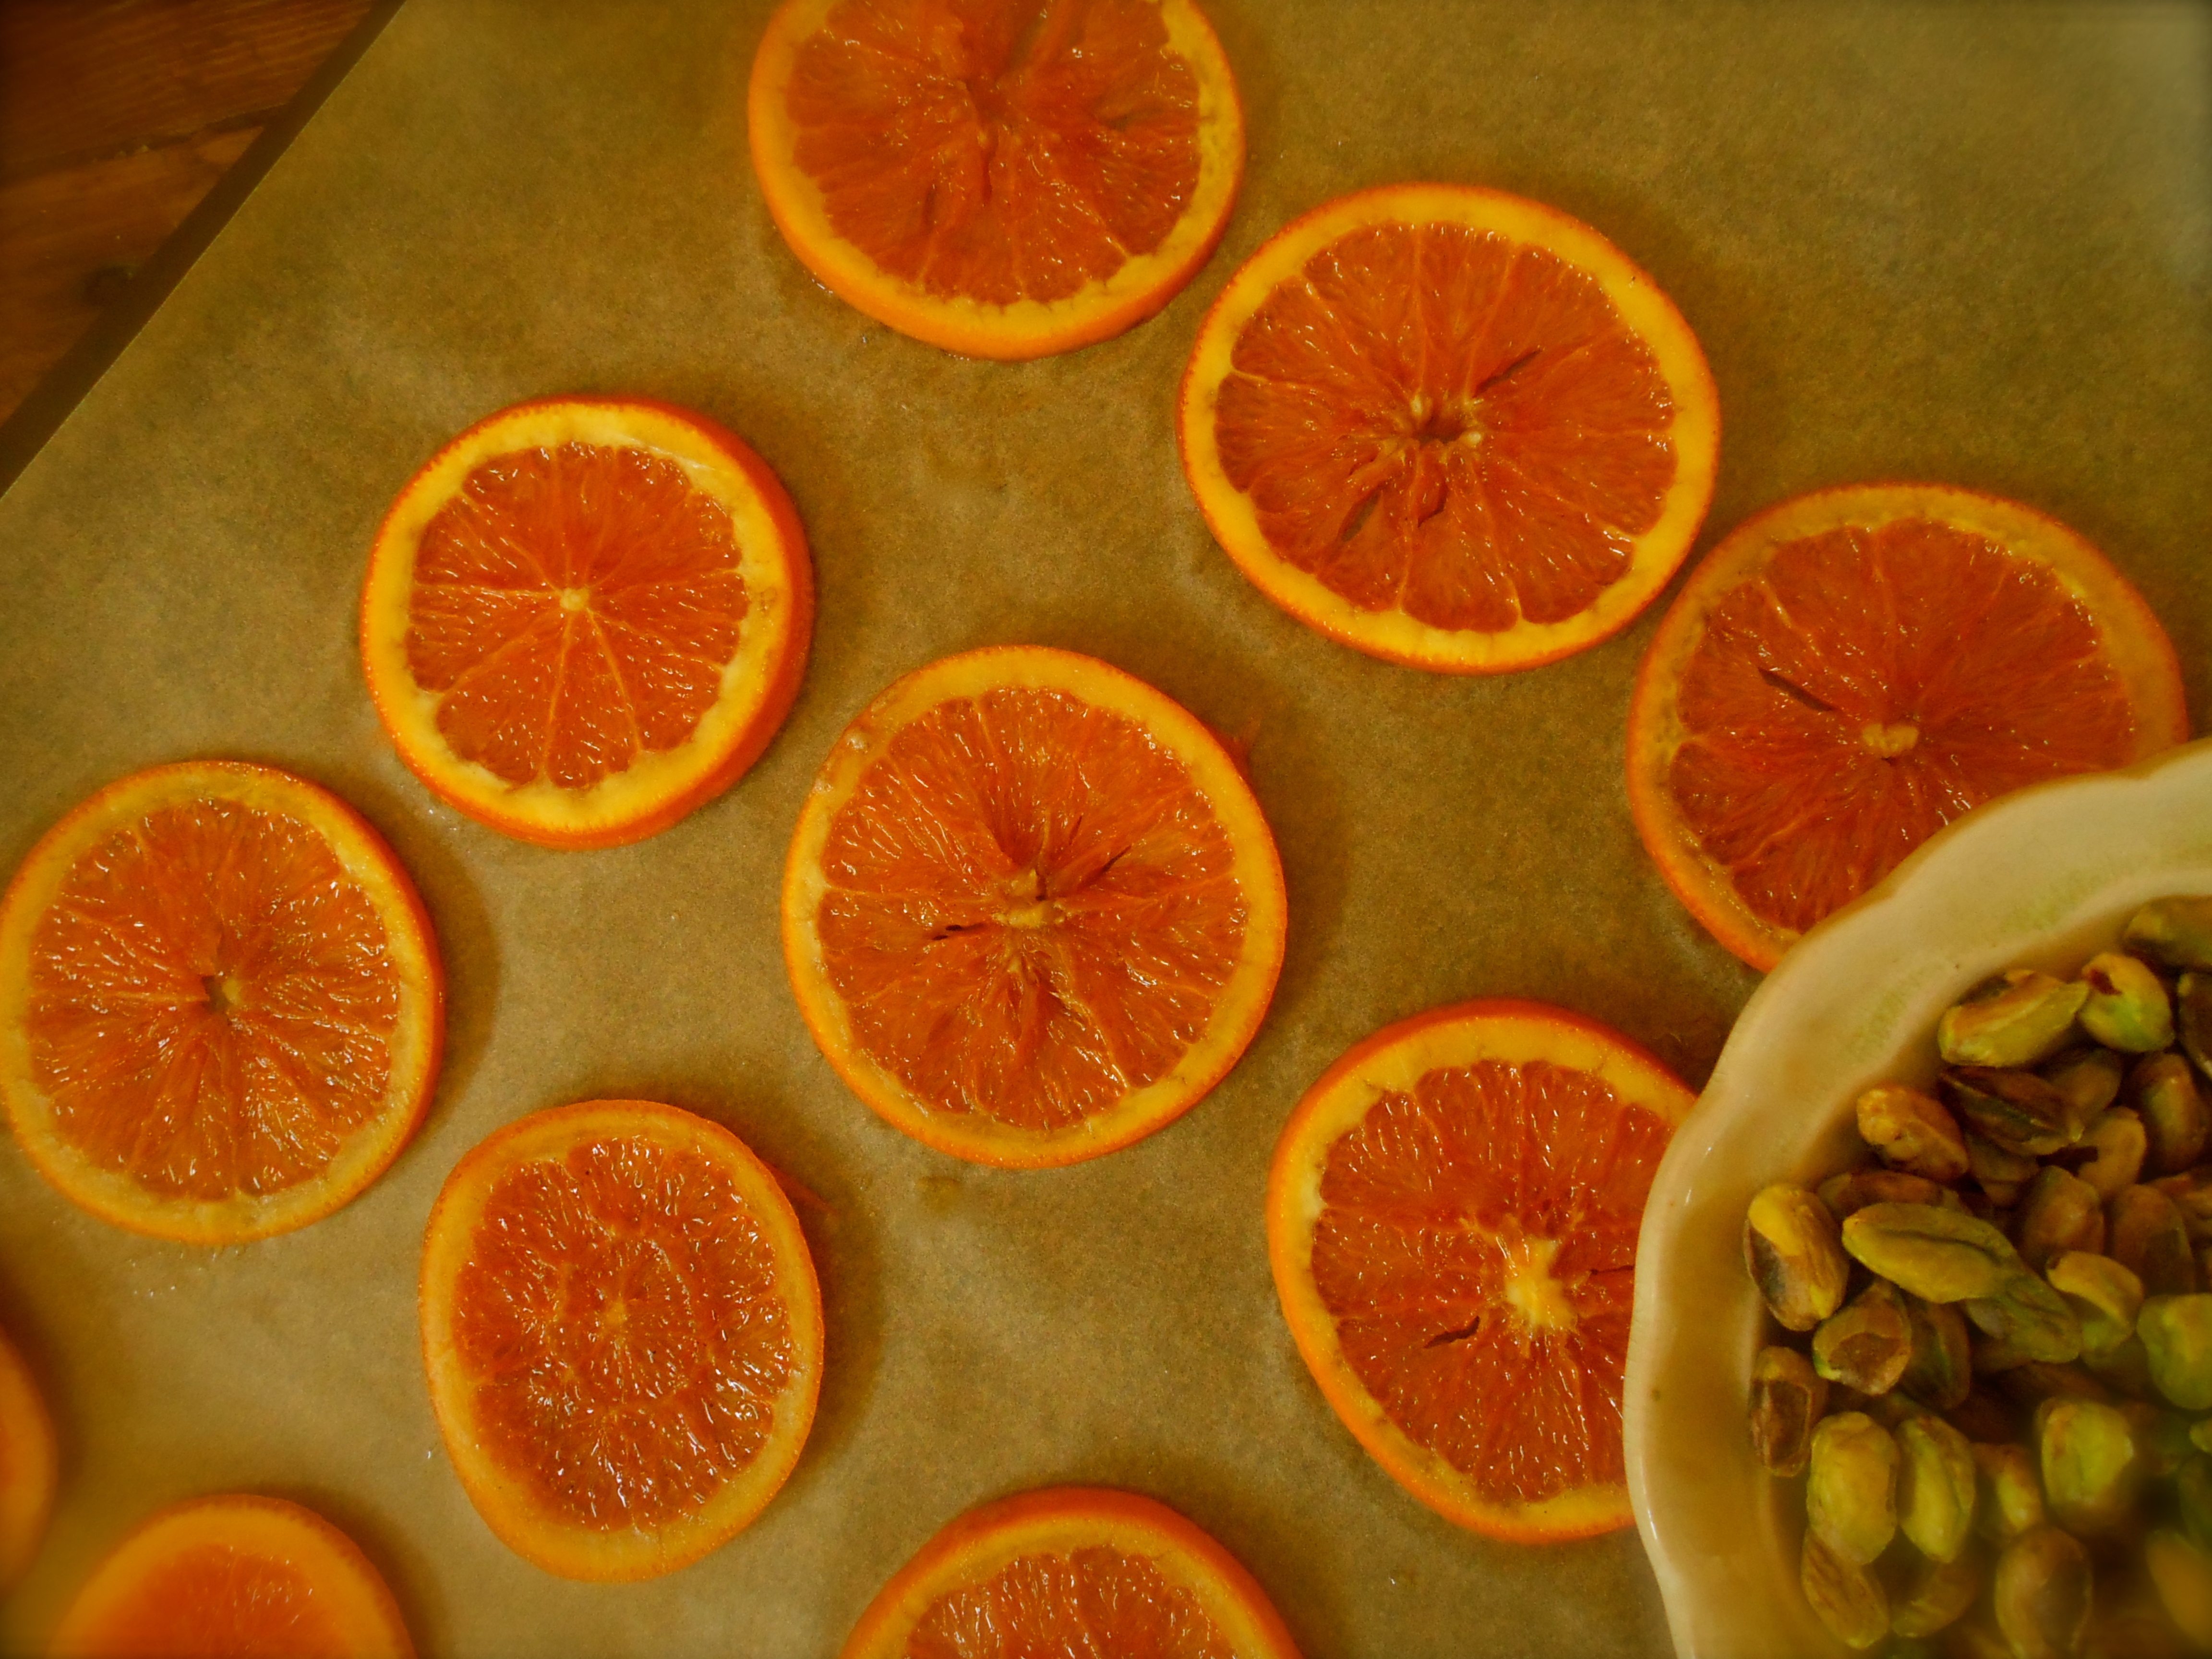
A few weeks ago I posted a honey cake adorned with rosemary blossoms. Here is another honey cake for you to try, this time using orange blossom honey and adorning the cake with glazed cara cara oranges.

My son, he’s 16, is the only member of this family with a sweet tooth. This cake was for him and by judging his reaction you get an idea of the deliciousness. “Mmmm, this is the best cake I have ever tasted.” He took another bite and with a mouth full said, “This is my new favorite cake!” After a few more bites he stood up, went to the refrigerator, poured himself a glass of milk and said, “Dad, even if you are full you must try a slice of this cake!” Success.
Recipe by The Bon Appétit Test Kitchen, June 2011 issue.
Syrupy Oranges:
- 1 cup sugar
- 3/4 cup orange blossom honey
- 3 tablespoons green cardamom pods, crushed
- 1 small orange, thinly sliced
Cake:
- 1/2 cup olive oil plus more for brushing
- 1 cup all-purpose flour
- 1/2 cup semolina flour
- 1- 1/2 teaspoons baking powder
- 1 teaspoon ground cardamom
- 1/2 teaspoon kosher salt
- 1/4 teaspoon baking soda
- 1/2 cup sugar, divided
- 3 large eggs, separated
- 2/3 cup plain whole-milk yogurt
- 1- 1/2 teaspoons grated orange zest
- 1 teaspoon vanilla extract
- Chopped unsalted pistachios, lightly toasted
Bake cake until a toothpick inserted into center comes out clean, about 25 minutes. Pierce hot cake all over with a metal skewer. Slowly drizzle 3/4 cup warm syrup all over. When syrup is absorbed, slowly pour 3/4 cup more syrup over. Reserve remaining syrup for serving. Let cake cool in pan on a wire rack. Run a thin knife around edge of pan to release cake. Remove pan sides. Arrange candied orange slices over. Sprinkle pistachios over. Cut into wedges and serve drizzled with more syrup.
